Pastor Tim's sermons are available on the Cornerstone Web site. We now support streaming, download, and podcasts as delivery methods. This page documents the methods used to prepare sermons for the web.
Update October 2007: These instructions are also being used to process the recorded intros and outtros for Pastor's radio show. However, I've recently made changes that require recording these components in mono. That would be fine - desirable, actually - for podcasting, but we need to create a stereo image for radio broadcast. Please review these steps for converting mono to stereo in Audacity.
Tools used for this project include the Audacity audio editor, VST plugins from [the now defunct] Kjaerhus Audio, the LAME MP3 Encoder tools, and AutoIt V3 scripting tools for Windows. All of these items are free downloads from the Internet. Please use these instructions to install and configure Audacity.
Post-processing the message generally consists of the following steps:
- Trim the audio to the desired portion
- Apply equalization, amplification, compression and limiting effects
- Fade out the closing music when Pastor finishes speaking
- Export the processed work is exported back to WAV format
- Create MP3 files from the exported WAV
Audacity can be linked with the LAME library files to export MP3 files directly, but the steps shown below allow a greater level of control.
Processing in Audacity
The first step is to use the selection tools to trim away everything before the beginning and after the end of the message. Be precise when finding the beginning of the message, but you can usually wait until after all other processing to apply the fade out at the end. Cut to where your fade will end.
After the message is trimmed, we need to adjust the recording for best sound after mp3 compression. The Classic EQ from Kjaerhus Audio is an excellent tool for this task. Select the entire message and pull down the Effect menu to select Classic EQ. Set both the left and right channels to match the image below, and do not modify any other settings.
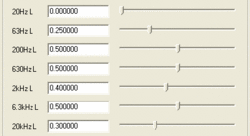
Note: 20kHz setting updated fall 2007
The settings are: 20Hz = 0, 63Hz = 0.25, 2kHz = 0.4, 20kHz = 0.3, all other settings left at default. These settings work for recordings made in our main sanctuary. If you are using these instructions elsewhere, you may need to experiment to find the best values for your environment.
This process rolls off the extremely low and high frequencies which will be discarded during the mp3 compression process for downloading anyway. These settings also work fairly well for higher fidelity mp3 compression of speech material. The slight notch at 2kHz keeps the squashed message from sounding nasal, and works well for Pastor's messages. You may need to eliminate or tweak this change for guest speakers, though it works well for many of them as well. For DMM messages recorded in the Fellowship Hall, I generally cut 6.3kHz down to 0.35 as well.
Removing this step as of October 2007. It may be needed in some environments, but we are no longer using it, as it makes the resulting levels too "hot" for our needs. After the EQ settings are applied, we need to make the overall volume as loud as possible without modification. This will eliminate the variations in recording level from week to week and make the results of the other effects more consistent over time. Again, select the entire message and pull down the Effect menu to select Amplify.
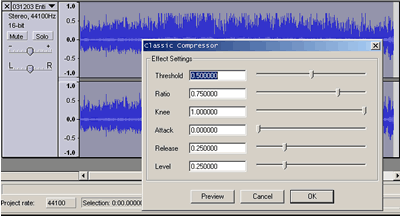
Updated October 2007: After compression, the message level is fairly consistent, but still has several high peaks that stand out, reducing the overall level of the material. The Kjaerhus Classic Master Limiter is applied to remove these peaks and boost the overall signal. Select Classic Master Limiter from the Effect menu and set a 0.8 reduction level.
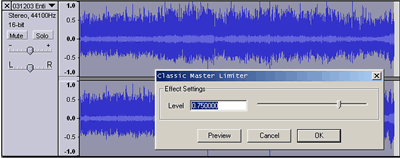
The resulting waveform is consistently strong, providing a level, intelligible signal. It may look like it is overdriven and clipped, but it really is not.
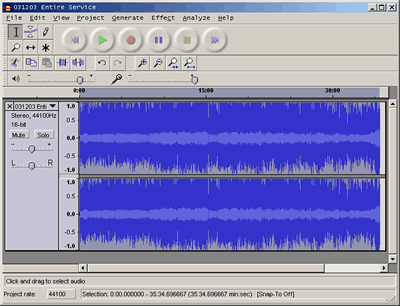
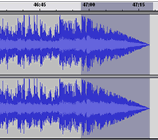
After limiting, zoom in on the end of the message. Select the final few seconds from the end of Pastor's speaking and apply the Fade Out Effect to smoothly fade the tail end of the music.
Now Select All and pull down the file menu. Choose Export Selection as Wav and save it to a new file name. You do not want to simply "Save As" because that would save your project in a proprietary Audacity format, which won't be useful. You also do not want to export as MP3 or Ogg Vorbis, because we will want better control over the compression process than the default settings applied here.
For file naming conventions, use the date in YYMMDD format, followed by the sermon title.
Creating an MP3 File
The instructions for MP3 file creation using LAME have been moved to a separate article.